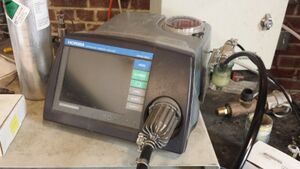
Horiba Emissions Analyzer
| Manufacturer | Horiba |
| Model | MEXA-584L 1400a Series |
| Support/Parts Contact | (248) 689-9000 |
The Horiba MEXA-584L is an emissions analyzer used in the Small Engines Research Facility. It reads percentages and parts-per-million of gases in the exhaust stream during engine testing.
Maintenance
Filters
Every time you run the Horiba you should check the three filters and replace them if needed.
- Pre-Filter: Located in the large white handle on the exhaust probe
- Dust Filter: Located under the large circular cap on top of the Horiba unit
- Strainer: Located on the back of the Horiba unit
Leak Check
The Horiba runs this test to make sure there are no loose connections or leaks in the lines.To run the leak check, press: Standby>Menu>Leak Check>Select on the main unit. Next, plug the end of the probe with your thumb. Once the probe is plugged, press Start and wait for the test to end. The Horiba will tell you whether or not you passed. If you passed, exit back to the main screen. If not, check lines and connections and rerun the test.
HC Hangup Test
The Horiba uses this test to see how much HC is left in the lines and filters, and calibrates to that amount to keep your data more accurate. To run the HC Hangup Test, press Standby>Menu>HC Hangup Test>Select on the main unit. Put the probe in fresh air and wait for the test to end. Be aware that this test can take from 15-30 minutes to complete depending on the condition of the filters and the amount of buildup in the probe. Once finished, exit back to the main screen.
Calibration
- Press Standby>Menu>Gas Calibration>Select on the main unit
- The Horiba will run the zero calibration
- The O2 screen will pop up
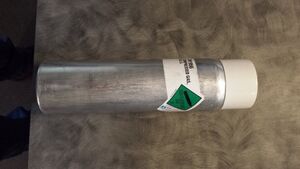
- Connect the gas cylinder
- Enter the value for the desired gas (found on gas cylinder label)
- Once the reading has settled press CAL, then Next
- Repeat steps 5 and 6 for each gas
- Remove the gas cylinder and replace the inlet cap
- Press the “MEAS” button to see real time values of the gases and press the refresh button to change which gases are displayed on the unit.
Testing
- Press “MEAS” on the main unit
- Turn on the computer on the bottom of the emissions cart
- Wake up the monitor in the observation room (Second monitor from the left)
- Log in and open the MEXA-584L software from the desktop
- Click on “MEAS” in the software and begin testing
- Read off the emissions values at desired engine points
- Be sure that the HC reading has settled before reading it off

