Parallels
Parallels are rectangular metal blocks used in milling machines mostly, to hold the work-piece to a level that matches with the cutting tool. Parallels ensure that the work-piece is always parallel to the surface of the machine table. They are usually made of stainless steel, cast iron, or tool steel to enhance their grip, as other metals cannot weaken these alloys easily. Several varieties and sizes of parallels exist depending on the type of work to perform. Parallel strips are ground steel bits, which are sold as matching pairs. Parallels are optional, as their uses are determined by the job at hand.
Purpose[edit | edit source]
The main purpose of the parallels is to ensure that the work-piece is well exposed to allow smooth working of the machine and without damaging the machine. They have a series of holes that are drilled on their front side to enable them position the work-piece or fit in clamps to remove any sharp edge on the work-piece.
Location:[edit | edit source]
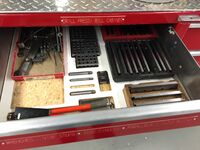
The regular parallel pairs are located in the red tool-box (cabinet 6) next to the shop office. They can be found in the first left drawer as shown in the picture. The non-rectangular parallels are located on top of cabinet#4 next to the CNC computers.
Step-by-Step Use[edit | edit source]
● Before using parallels, make sure:
o To choose the right size of parallel pairs (figure a).
o The parallel pairs and the workingspace are well cleaned.
● Steps:
1. Place the parallel pairs on the working space.
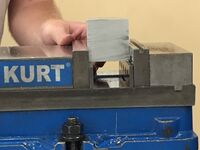
2. Place the part on top of the parallels (figure b).
3. Tighten the workspace so the part cannot move.
4. Gently, try to move the parallels with a finger left and right. If parallels are not moving, then you are good to go.
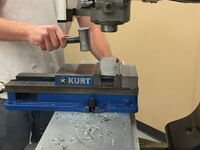
5. If parallels are moving, grab a lead hammer and gently hit the center of the part and check the movement of the parallels. Keep doing this process until parallels are secured and not moving (figure c).
Note: If the steps above did not work to make the parallel pairs still, then the bottom surface of the part is not perfectly straight. You can try another surface or try to make the surface straight.
| Description | Graphical Display |
|---|---|
| 1) Choose the accurate size to allow smooth working on the piece. | |
| 2) Place the Part on the parallels. | |
| 3) Use the lead hammer to make the working-piece stable on the parallels by tapping on the center of the working-piece and push the parallels to make sure they do not move. |


