SEL Thermal Card Guide
| Sponsor: | Schweitzer Engineering Laboratories |
| Duration: | Fall 2017 - Spring 2018 |
| Team Name | Cooler Than Before |
| Faculty Advisor: | |
| Consultants/Mentor: | |
| Team Members: | |
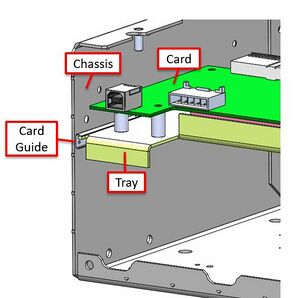
The goal of this project is to develop a card guide design that can be applied in SEL equipment that has a net thermal resistance less than 1 ⁰C/Watt between an aluminum tray (.05"-.1" thick) and the chassis (.05"-.1" thick). This involves creating an instrumented test stand for measuring heat transfer across the card guide. Results should be reconciled against an analytical model to assure accuracy. The recommended solution should meet SEL standards for vibration.
Problem Definition[edit | edit source]
Deliverables[edit | edit source]
- Experimental test set-up that can accommodate different guide configurations
- Experiment design and test results that demonstrate which guide configurations are most effective
- Comprehensive project documentation for easy future reference by client
- Proof of Concept guide design
Specifications[edit | edit source]
| Sepcification | Details |
|---|---|
| Thermal Performance | Net thermal resistance of the guide must be ≤1°C/W between the tray it is supporting and the chassis it is fixed to. |
| Reliability | Low DPU/Replaceable in case of failure. |
| Part Cost | Card guide needs to cost less than $5.00/part. |
| Insertion Force | Actual force of insertion. |
| Corrosion Resistance | Must not promote galvanic corrosion. |
| Operational Simplicity | How easy it is to use. |
| Dimensions | The card guide is to be 5in* long, 0.38in wide, and 0.50in tall. Design able to support variable length and variable tray thickness. |
Project Learning[edit | edit source]
SolidWorks Flow Simulation[edit | edit source]
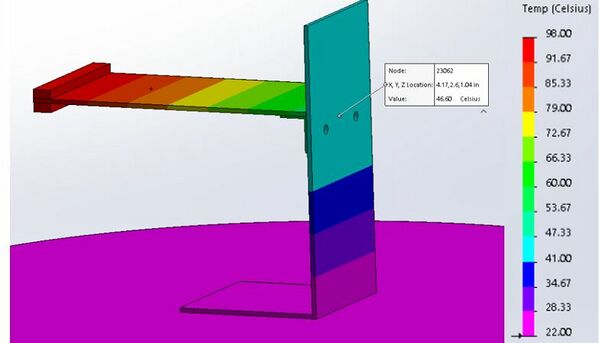
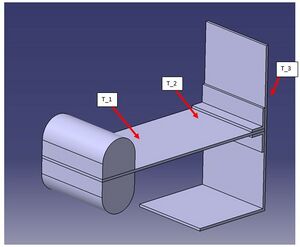
To determine a suitable card guide deign our group used SOLIDWORKS to model heat transfer rates with Flow Simulation. This was then calibrated to match the experimental setup, so we could have a verified test apparatus once the guide was manufactured.
| Test Setup | Description |
|---|---|
|
|
The testing aparatus was then simplified to a two plate study, so we could control temperature boundary condition and solve for varying surface area, thickness, contact pressure, and material properties. All these factors were varied in parametric studies to determine the point where thermal conduction is optimal.
Experimental Setup[edit | edit source]
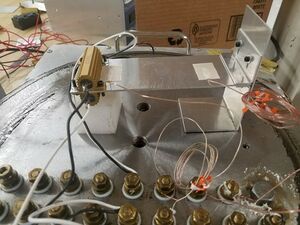
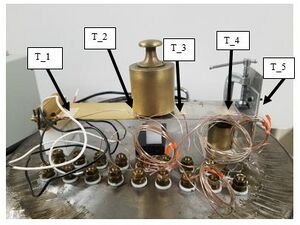
For our test setup we have created a scale version of the thermal card guide. This experiment would allow us to use thermocouples to measure temperature differences on the guide and determine the conductive power. To do so the resistance was calculated using R=L/kA, where R is resistance, L is length between two thermocouples, k is the thermal conductivity of the material, and A is the cross-sectional area of the tray. Once resistance is found we used Q =(T_1-T_2)/R, where Q is the conductive power, T is the temperature at a point, and R is the resistance calculated.
| Initial Setup | Thermocouple Figure | Description |
|---|---|---|
|
|
| Pressure Test Setup | Description |
|---|---|
|
|
Experimental Results[edit | edit source]
After completing the experiments we were able to draw some conclusions from the data. However, these experiments still have some distance to cover as matching it to the SolidWorks Flow-Sim models have not been fully achieved. There was still 22% difference between the simulation and the actual experiment, but the simulation was conservative in estimating the resistance. With the pressure experiment there was only a 13% difference between the conductive resistances of the aluminum and brass, functionally the brass could replace the aluminum as material for the guide. That being said the brass would be much more expensive. Secondly in the pressure experiment, to reduce thermal contact resistance, pressure was found to be effective.
Guide Designs[edit | edit source]
Initial Designs[edit | edit source]
| Guide Design | Picture | Description |
|---|---|---|
| One-Piece Guide |
| |
| End Capped Guide |
| |
| End Latching Guide |
| |
| Internal Pressure Guide |
|
Final Design[edit | edit source]
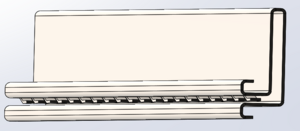
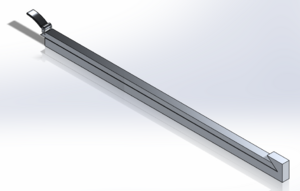
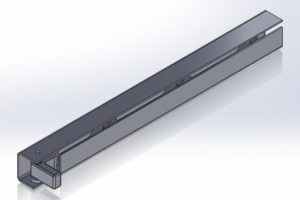
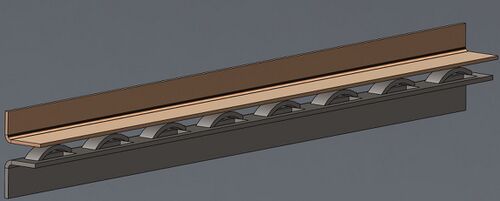
For our final design we created a two piece card guide with one thermally conductive piece and another used to apply pressure to the tray when inserted. This will ensure better contact with the guide and decrease contact resistance, which was the biggest issue with our system.
| Final Guide Design | Description |
|---|---|
|
|
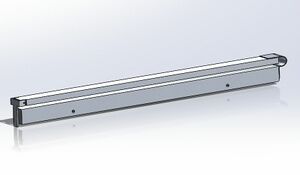
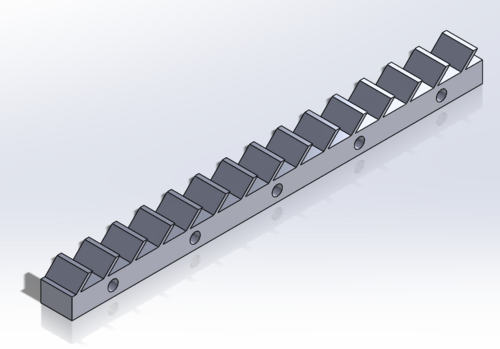
The Final Guide Design had intricate bends in the spring steel, so it couldn't be produced in the shop and its manufacturing required a 6 week lead time. As an alternative our group designed and 3D printed a PLA bracket to use as a proof of concept.
| Proof of Concept Design | Description |
|---|---|
|
|
Design Validation[edit | edit source]
| Parametric Model | Description |
|---|---|
|
|
Team Information[edit | edit source]
| Team "CTB" | |||||
|---|---|---|---|---|---|
| Member | Biography | Discipline | |||
| Marc Dobson
Team Orginizer |
First generation college student, born and raised in Idaho. Anything outdoors is my game, but Netflix is also my friend. I choose to become an engineer to create a positive change in not only the world but my bank account as well. | Mechanical Engineering | |||
| Collin Mabe
Treasurer |
Born and raised in Boise Idaho I look forward to starting my career as an engineer in the near future. I enjoy fishing, hunting, hiking, and really anything that involves the outdoors. Using my skill set to help engineer a better world is the source of my drive, hopefully someday I will get to realize this dream. | Mechanical Engineering | |||
| Nick Tobe
Primary Contact |
Graduating senior at the University of Idaho from Eagle, Idaho. I plan to move to Auburn Hills, Michigan to pursue a mechanical engineering career in the automotive industry. I enjoy playing soccer and biking during the summer and in the winter I spend my free time snowboarding. | Mechanical Engineering | |||
| Michael Wendell
Secretary |
I am from Eagle, Idaho and am Senior in Mechanical engineering at the University of Idaho. I plan to graduate and move to Boise and find a career in engineering. My interests include golfing, playing soccer, and riding my motorcycle. | Mechanical Engineering | |||
