User:Park0387
Test page
3D printing uses 3D digital models to create solid fixtures by printing layer upon layer of plastic material.
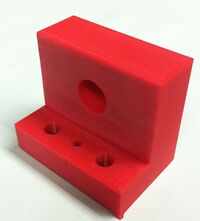
3D printing has been around since the mid 1980’s. It has only became practical in the past seven to eight years as 3D printers have come down in price. The University of Idaho uses 3D printing to rapid prototype plastic parts to be used in student projects. Currently the University has two 3D printers available for use, the BST 1200 and MakerBot Replicator 2.
Makerbot[edit | edit source]
| The MakerBot was purchased by the University of Idaho in 2012. It is a relatively easy to use printer that can provide medium to low quality prints. It is currently maintained by Person in Place. If you have any questions about how to use the MakerBot, refer to them.
Tutorials on how to print using the MakerBot are below:
|
 Makerbot Replicator 2 [1] |
BST 1200[edit | edit source] | |
|
The BST was purchased by the University of Idaho several years ago. It is currently maintained by Another Person in Another Place. The BST produces higher quality prints but is more expensive and difficult to use. If you want to use this machine, contact Another Person for more information. |
 Stratasys BST1200 [2] |
Differences[edit | edit source]The old 3D printer (BST 1200) at University of Idaho was tens of thousands for the machine and ten dollars a cubic inch for printing material. The new 3D printer (Makerbot) was a few thousand to purchase and is one dollar a cubic inch for printing material. The change in costs came down significantly for several reasons. First, as 3D printing becomes more popular mass production lowers the cost of the machine. Also, new improvements in manufacturing technologies make the printers less to produce because the components are easier to make and more common in other machines. The newer machines also fill the missed market of midrange quality printers that was being ignored. However, the biggest change in price is the material being used. Instead of using Acrylonitrile butadiene styrene (ABS) plastic like the BST 1200, Makerbot uses Polylactic acid (PLA) plastic. Makerbot does not have the quality of the BST 1200. This is because of the property differences in the material and the quality of the machines. A good example of this is the smoothness that parts made with the BST 1200 have. Parts from Makerbot can only as smooth if sanding is done after the printing process. Makerbot also does not build arches and overhangs well. BST 1200 uses a separate type of plastic to support arches and overhangs. The support material can be broken off fairly easily. Makerbot can provide supports by printing thin sections of PLA, but this results in a fairly rigid print that will need a great deal of post print sanding. | |
|
How 3D Printing Works (MakerBot Example)[edit | edit source]3D printers work by taking computer generated code and laying plastic down in layers to build a solid 3D model. | |
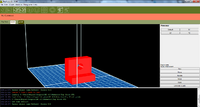
Code Generation[edit | edit source]The code is generated by a computer program that takes the coordinates of the 3D model and slices it into layers across the Z axis. It then calculate the areas to be filled for the XY plane for each layer. To conserve plastic, the machine will automatically hollow the object and create a support structure system in the hollowed space. When read by the machine, the code provides the XY coordinates of where to lay plastic. Machine Setup & Printing[edit | edit source]Before the machine can begin its print it has to be set up, this includes verifying the tray is level and waiting for the machine to heat up. Preheating is necessary for the part to be built properly. After the code is loaded and preheating is done; the machine can begin its print. Printing is accomplished by moving a hot needle across the print table with two stepper motors. The motors are controlled by the printer’s computer unit so their location is always known. This process is works like a typical CNC machine. The needle that lays the plastic controls its flow based on the temperature. Only in advanced systems will the temperature change after the preheat is done. Once the first layer is complete, a third stepper motor moves the print table down across the Z so the next layer can print. This process is repeated for each layer until the part is complete. Post Print Processing[edit | edit source]Finished parts typically come out rougher than desired or experience shrinkage. 3D printed parts can be sanded, drilled, or otherwise machined in order to fix these print errors. |
|
References[edit | edit source] | |


